A Berry Simple Wreath
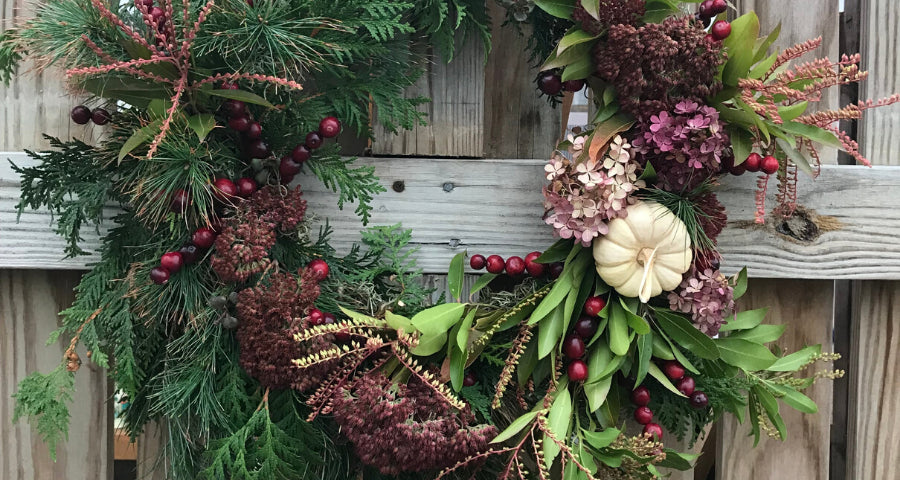
A natural wreath is a perfect way to add cozy and festive charm to your home. Unlike most other holiday preparations, it's also inexpensive, easy, and impressive.
We asked DIY maven and plant connoisseur Amy Oliveira, aka Chlorofilly, of Roseland Nursery in Acushnet, MA to walk us step-by-step through the natural wreath making process. Now we've passed the result on to you in our first ever blog takeover!
What you'll need:
- Wreath frame - $5
- Decorative moss (Spanish or Sphagnum would work. We used Spanish moss in ours) - $9
- Twine - $4
- Clippers
- Floral Wire - $3
- Fresh Decas cranberries - $3
- Fresh plant cuttings (used in the example: arborvitae, white pine, andromeda, hydrangea flowers, stonecrop, and sedum) - Forage for FREE, or you can get Free or cheap cuttings of greens from your local home improvement store once they start cutting Christmas trees.
- One small pumpkin - $1
- Optional: Wilt-Pruf Spray - $10-15

How to:
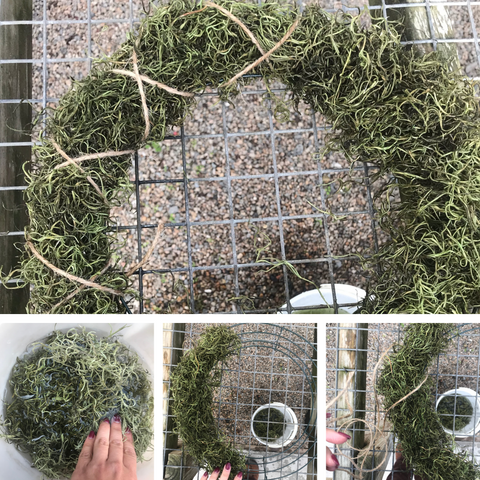
Step 1: Creating the Base
Soak moss in water for at least 5 minutes. This makes it a little easier to work with, and helps to keep plant cuttings fresh as you arrange them. Once soaked, remove moss from water and place it onto the wreath frame. It’s important to make sure that you don’t skimp on the moss during this step, as this will serve as the base for your cuttings. A nice, densely packed layer where the frame underneath is barely visible is the goal.
Once you’ve layered on your moss, begin fastening it onto the frame using twine. Cut one long piece of twine, and wrap taught around frame and moss in a simple criss-cross pattern, knotting at the end. Doing the moss and tying one section at a time may be more manageable than trying to do the whole thing in one shot, even on a smaller wreath. Just be sure to overlap your twine onto the first section once you begin a new one, to prevent any loose areas or gaps in your base.
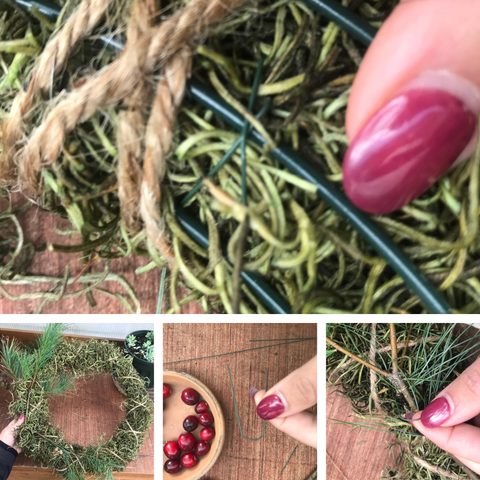
Step 2: Foraging
Grab your clippers and take a stroll through the garden. Here, I started with a few handfuls of pine and arborvitae cuttings. As you’re selecting your cuttings, think about how you would like the overall layout to flow. Do you want a big, fluffy wreath, with branches coming out in all directions? Do you prefer a more asymmetrical look, with a distinct focal point? Once you’ve selected a few bundles of evergreens, perhaps take a look at other items in the garden that catch your eye. Fall is a great time to find dried flower heads, seedpods, or even some interesting shaped branches. It’s up to you! Make it your own unique combination.
Step 3: Creating Your Design
Once you’ve gathered your cuttings, begin laying them on top of your wreath frame to come up with ideas for your overall composition. Starting with the largest cuttings, begin attaching them to the base. To do so, take the cut end of your branch, and tuck into the moss.
Cut a 3-4 inch piece of floral wire and bend in half, creating a pin. Use the pin to then tack down the cutting, sticking all the way into the moss. Flip your wreath around to the backside and bend the ends of the pin to cross, then tuck these ends back into moss.
If you are adding a small pumpkin, cut three lengths of floral wire. Pierce halfway into the bottom of the pumpkin in a tripod shape. Stick the pumpkin onto the moss and fasten the wires on the back of the wreath.

To create strands of cranberries, cut your desired lengths of floral wire, making sure to include a couple of additional inches for fastening the strand to the moss base. Use clippers to create a small hook at one end. Pierce a fresh cranberry with the pointed end of the wire, and push the berry up towards and into the hooked end. Continue to add cranberries to the strand, leaving the bottom few inches of the wire bare. Stick the end of the strand into the moss and then bend/tuck in a similar fashion to the pins.

Continue layering and embellishing until your creation is complete.

Step 4: Finishing
Tie a small loop of twine or festive ribbon onto the top of your metal frame base to hang the wreath.
Arrangements made from live cuttings can be enjoyed for as long as the plant-life can be preserved. To help extend the life of your cuttings, a few additional steps can be taken. Choose a location where the wreath will remain cool and protected, such as the outside of your entryway door. You may also choose to spray your finished wreath with an anti-transpirant spray, such as Wilt Pruf, a natural pine oil emulsion that prevents evergreens from losing moisture.

Be sure to tag us (@DecasFarms, @Chlorofilly, and @RoselandNursery #BerrySimpleWreath) if you try this out in your own home!